Getting De-railed

Anna's blog

Some Thoughts on Test-Driven Development

Test-driven development has become quite a buzzword these days, with some companies produly announcing that they pursue it, some brushing it off as the latest coding fad, and some falling somewhere in between: writing and running some tests, but well after the code was actually written.


What does it Do?

Technically, it means writing both code and automated tests for it simultaneously.

I like TDD for two main reasons:

  • It forces you to think about your code and your product and be proactive about what could break.

  • It does tell you when something breaks – why would you not want to pursue that?

  • It helps you future-proof your code, especially if someone other than you might be using it. Seeing tests written for an app is a great way to understand how that app works.

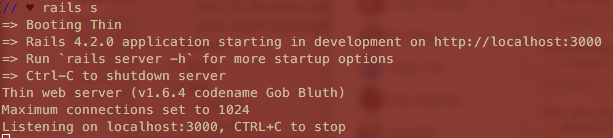
Rails comes with some skeleton tests that are designed when creating a new project or running a scaffold (run -T or --skip-test-unit to avoid having tests be created with rails new; run --no-test-framework when using a generator.) They are usually found in your test folder.

Interestingly, DHH, the man who created Rails, does not practice TDD at all and advocates in favor of live testing.

While there are some good books on test-driven development on Amazon, there are a lot fewer of them than

I have been thinking of good ways to frame test-driven development.

Here are some things I have learned so far:


Write Tests First

I think the tricky thing is to actually pursue test-driven development – as in, to let the tests drive your code, and not write tests after you finish coding. I am most certainly guilty of the latter. Pursuing the latter is actually still better than not writing any tests, but to me, having the tests drive what you are building implies a much better understanding of your code.

So that’s the idea: write a test, write enough code for the test, repeat.


Red-Green-Refactor

There are multiple approaches to writing tests. Red-green refactoring is what I really like: make the test fail (show up as red in your Terminal depending on the language you are running) before you make it turn green / pass. That way, you are actually ensuring you understand what your test is doing by breaking it and assembling it back together. Then refactor your code if it can use optimization, and repeat.

When writing tests that fail first is that the test is just an ideation of what your code is suppsoed to do, but the code is not there / ready yet, and your job is to make it pass.


Where Do I start?

I have found it helpful to start with accessing what the code has to accomplish. Outside of the generic ‘this app has to serve as a social network for ferrets’ mission, it helps to go through the basic ideas:

  • What are specific things my code / app needs to go?
  • How should be able to manipulate my code / app?
  • What are inputs and outputs that go into the code?
  • What are the errors and some edge cases? (I always find I think of more edge cases and go back to add tests for them as I keep working on a project.)
    • With regard to errors, it is helpful to know some basic Ruby errors / exceptions so that you can speicficialyl test for them. Read more on exception handling here.

Which brings me to:


How Do I run Tests?

RSpec is one of the most popular Ruby gems.

Run rspec install, bundle and then rspec --init.

There are a lot more laws, principles, and tips on how to actually use rspec out there, and I plan to talk more about it in the future.


Extra Credit

If you are looking for more detailed TDD steps, some good input can be found here.

Ruby Loop -- With a Twist


Decrementing loop:

Let’s start with a siimple decrementing loop in ruby:

This produces all integers from 100 to 1, each on a separate line:

To produce a slightly more legible output that does not crown our terminal, use print instead of puts

Output:

There is also a downto method:

My favorite – that I always conveniently forget about on the spot – is reverse_each

reverse_each is really a play on the regular each method used with a range, with would iterate through a loop in ascending order:

To go a little bit fancier and with needless amount of work really, populate and array from a range and then iterate over it:

Let’s not forget the step method:


Decrementing | incrementing loop:

What if the task is to have the x counting down, but to have the integers in the output counting up?

There is a very simple mathematical solution to the problem:

The result is exactly what we are looking for:

(Here I also added a newline so that it does not clash with terminal prompt.)

I thought of this when asked on the spot, but it’s not exactly an elegant solution:


Incrementing counter | decrementing output:

Easy and more or less creative solution using a previously populated array for a counter that goes up from 1 to 100 and for an output that goes down from 100 to 1:

Output:

Global Variables in Ruby


Variables in Ruby and Their Scope:

There are four major kinds of variables in Ruby, like in most object-oriented languages:

  • Global
  • Local
  • Instance
  • Class

There are also special variables such as self or nil, and of course, one can classify constants as a kind of a variable.

In this post, I want to talk about global variables, which, as the name implies, are stored globally and have global implications.

All variables in Ruby outside of locals ones are indicated with a sigil (a prefix that denotes variable scope): @ for instance variables, @@ for class variables, and $ for global variables.

Since Ruby is a dynamically typed language, interpreter will determine data type of each and every variable when it is being assigned; there is no need to define each variable’s data type when introducing it (so no need to type keyword global like in PHP).

If you specify a global variable, but not initialize it, it will return a nil pseudo-variable:


The Problem with Using Global variables:

Global variables are incredibly easy to use (I see sooo many games of Tic Tac Toe with global variables written by Ruby beginners), but also quite easy to abuse as they cane be accessed from within anywhere in your code even though the code refers to two separate classes:

Global variables violate the principle of encapsulation) by allowing one part of your code to modify another part of your code without an explicitly defined interface. Over-using them probably means that app was not thoroughly thought out.


When to Use Global variables: Pre-defined Global Variables

Even though global variables are generally considered to be un-Ruby-esque, Ruby does include a number of useful global variables (largely a Perl legacy) with a $ followed by a single character or a word that have a pre-defined meaning.

Below is just a selection of those, see a full list in Ruby docs or by running $global_variables:

Similarily, you can run self.instance_variables on an class instance, or Class.class_variables on a class.)

  • $0 – contains the name of the script being executed. Is assignable.

  • $0 – current line number of last line from input.

  • $: – same as $LOAD_PATH, shows load path:

  • $$ – shows process ID (PID) of current script:


Pre-defined Global Variables vs. Global Constants:

Constants are an opposite of variables, but since Ruby has a number of global constants, I thought it would be good to briefly mention them as well.

The most commonly used global constants are ENV and ARGV.

  • ENV gives access to environmental variables in a Ruby hash with variables as a hash key.

  • ARGV gives access to command-line argument values as strings in a Ruby array. It is also aliased as $*.

Tracing Global Variables:

Check out this RosettaCode screenshot example for the classic 99 Bottles of Beer coding exercise:

The docs say this re: trace_var:

Controls tracing of assignments to global variables. The parameter symbol identifies the variable (as either a string name or a symbol identifier). cmd (which may be a string or a Proc object) or block is executed whenever the variable is assigned. The block or Proc object receives the variable’s new value as a parameter. Also see Kernel::untrace_var.

This is the example that the Docs use:

As you can see, one can pass a symbol that names a variable and a block of code or a string to the method. When the value of the variable changes, the block of code will evaluated or the string will be invoked (see more in The Ruby Programming Language, 2008, p. 280)

Which means:

And this is exactly how the 99 Bottles of Beer example works!

To stop tracing the variable, use untrace_var just like Ruby docs above specified.

Basics of Speeding Up Rails App

This is a 101 post, and I am planning on touching more on the topics below in greater details.


There are three main ways to make Rails apps faster:

  • Code optimization
  • Scaling
  • Caching

Scaling:

Scaling generally refers to making sure an app remains fast when number of users grows quickly.

So you are a startup that built an app that uses Ruby and Ruby-on-Rails. You did not particularily optimize anything because you just wanted that sweet venture capital for your prototype – or maybe you did not know what you are doing. Then your startup hit it bit despite the odds, and now you have thousands of users coming to use the app everyday. And that’s when things slow down.

Pure Ruby is rather slow, compared to, say C, but there are still ways to make things work efficiently, and I will talk about these.

Heroku scales things for you if that is your deployment tool of choice. Other hosting services tend to have similar solutions.


Caching:


Code optimization:

This is the most realiable way to make

What About Localhost:3000?

Most people new to rails go through some sort of ‘make-an-app-in-under-15-minutes’ tutorial, which always includes instructions to run rails s or rails server to get a preview of your app.

Typing it into a console usually produces something like this:

That means that a Rails server is now listening on port 3000.

And when you point your browser to localhost:3000 (or alternatively http://127.0.0.1:3000/, where http://127.0.0.1 is your computer’s loopback address), you see the standard Welcome Aboard message:

Of course that is the case where the app is either blank (so that going to leads to a blank website or no root page has been set up) so that when you click on http://localhost:3000/rails/info with server running, you see this:

(note that it only works for development environment; once your app is deployed, say, my-app.herokuapps.com/rails/info won’t work unless you have built that route and populated it.)

In fact, localhost:3000 is so common that someone registered a website that takes you to a website that reminds you you forgot to start your server, if that is indeed the case.

Note that when using Chrome, you can just type in localhost:3000, but for Internet Explorer, you would need to point your browser to http://localhost:3000, otherwise, you will see an error message.

Once your app has a model or two and corresponding migrations have been run, you will be able to point your browser to, say localhost:3000/users if a User model is present.


Why 3000?

I haven’t been able to find a comprehensive answer to why Rails uses port 3000 vs. any other port. Octopress uses 4000; Sinatra uses 4567; shotgun uses 9393. Meteor also uses 3000 as a development default. There is a fairly comprehensive list on Wikipedia.


What if I want to use another port?

To switch port to, say, 80, run this:

rails server -p 80

You might need to prepend it with bundle exec.

You can use an alias if you plan on often changing your default development port: alias rails-server-port='rails server -p 80' (using nano .bash-profile)

See documentation on it here as I could not find any actual description in Terminal:

rails s will run as development, not production, by default. To change port for a different environment, run something like:

rails server -e production -p 4000


Some Ruby / Rails / General Coding Resources

I keep getting asked what my favorite coding resources are, Rails or otherwise, so this is an attempt at keeping a running list, in no particular order. I fully intend to come back and edit this post as I stumbple upon new resources.

There are a lot of really great blogs from people writing Rails, and sometimes when googling something, I see amazingly written posts on fairly esoteric subjects. The resources below tend to be consistently good and conventional – and enough to keep new developers occupied for a long, long time.


Rails newsletters:

They have a lot of overlap, but since they come out on different days, sometimes it’s nice to see a reminder that I meant to read an article or explore a new gem.


Resources:


General Resources:

  • CoderCareer – not Ruby/Rails-specific, but lots of cool content discussing coding interview questions and how to answer them. Gets updated very rarely though.

  • Ignita – also rarely updated, also lots of cool content.

  • A Tornado of Razorblades by Adam Wiggins, a founder of Heroku. – also rarely updated, also pretty cool.


Blogs:

  • Justin Weiss. Updated less often than many people would like, but still an amazing read.

  • Thoughtbot blog. Those are the guys behind FactoryGirl and Paperclip and many, many other projects. Enough said.

  • Official Rails Weblog – great way to get a gist on what is happening in Rails.

  • Ruby on Rails subreddit – not the best daily read, and it’s too easy to get distracted by the cat memes in other subreddits, but cool to check out once in a while.

  • RubyFlow – community-sourced. Content varies from “what’s new in Rails 5” to discussing very technical subjects.

  • RubyInside – archive of some cool reads.

  • Blog by Arkency, a dev shop. These guys know what they are talking about.

CSRF Part II -- CSRF vs. XSS

I touched upon CSRF (cross-site request forgery) in my previous blog post, but as I was mentionining that it is distinct from XSS since the two get mixed up sometimes (must be the multi-fricative-consonant abbreviation), I realized that I should discuss it in greater detail.


Web Attack Types Vulnerabilities: Gotta Catch ‘Em All

Both XSS abd CSRF are types of web attacks (there are more than these two, but I have seen people get them confused, and they do have interesting parallels). XSS is cross-site scripting. CSRF, as previously mentioned, is cross-side request forgery.

The fundamental conceptual difference between CSRF and XSS is that CSRF exploits a website’s trust (authentication) of a user, whereas XSS exploits a user’s trust for a website.


XSS: The Mechanics

XSS involves injecting malicious scripts (in the case of Rails, it would usually be JavaScript, potentially combined with HTML, often with a <script> tag) into a webpage. That script can be then executed when other users access the website.

For instance, a hacker introduces some JavaScript to the comments section of a webpage, and when other users try to access it, the script is executed and, say, the user is re-directed to a porn website they otherwise from their original destination S.H.I.E.L.D. subreddit.

XSS attacks are incredibly common and easy to execute if a website does not have appropriate security features.


XSS and Ruby on Rails: Opting Out of HTML Escape

As with CSRF, Rails comes with a reasonably strong protection against XSS attacks. That certainly makes life easier for most beginners who want to have a reasonably secure website without spending too much time researching security and focusing on building other skills first.

The idea behind Rails XSS protection is automatically sanitizing user input so that nothing gets executed as a script if it’s not meant to be. Back in the day, that had to be done manually, which, was extremely time-consuming and error-prone. So Rails 3 incorporated a simple idea: opting out of html escaping instead of opting in, if need be.

It accomplished that by integrating RailsXss plugin, and the feature became part of Edge Rails as early as October 2009 (see more on Edge Rails in my post here ).

Rails 3+ officially supports this feature, and it backports to earlier versions of Rails as well.

I noticed from reading source code that Rails now assumes that no string input is html_safe? by default, while integers are:

This is what it looks like in Rails console:

Html escape it can be still done manually with an html_escape in front of whatever you are rendering within the erb tags.

html_escape can be also aliased as h, and it is fine to use it even if something is getting html escaped by default as Rails will recognize it as such and will only escape it once.

See example from source code:

The potentially ‘dangerous’ charactaters are converted into their human-readable equivalents as the same source code indicates:

HTML_ESCAPE = { '&' => '&amp;', '>' => '&gt;', '<' => '&lt;', '"' => '&quot;', "'" => '&#39;' }

Similarily, html_escape_once escapes HTML code without affecting existing escaped code:

If you do not want user input to be sanitized, then using raw in the erb template is the way to go, e.g.:


If That Were Not Enough

Wikipedia article is a good starting point.

This Railscast episode is worth spending 8 minutes on, even though it is a bit older.

And as usual, more on XSS on the Rails Guides website.

What's CSRF and What Exactly Are We Are Protecting From Forgery?

Running any Rails new command will produce a ApplicationDirectory/app/controllers/application_controller.rb file that looks like this initially:

Since Rails is so beginner-friendly, many new developers are too preoccupied with making an app that works (why do my routes look like that?!) than looking into each and every line of generated code. I find that the CSRF-related line of code in a standard ApplicationController is particularily often overlooked. I wanted to discuss it here as it is connected a serious security issue often encountered on the web.

The Ruby on Rails API has a comprehensive guide explaining what protect_from_forgery does. It still assumes a basic understanding of CSRF.

CSRF, just like XSS, which will be discussed in the next post, is not a Rails-specific problem, and it really affects all computer systems and all languages, although this post will discuss in the context of Rails.


How CSRF Works

CSRF (sometimes spelled as XSRF) stands for cross-side request forgery. It is, according to Wikipedia, sometimes pronounced as see-surf (which I absolutely did not know prior to reading the Wiki article). However it is pronounced, it involves an attacker submitting malicious commands to an app that appear to come from a user that the app has authorized and that the browser trusts. The hacker can therefore gain control of an account.

CSRF is sometimes refered to as ‘session riding,’ a pretty accurate description as you’ll see.

Note that this is different from XSS (cross-site scripting).

Most Rails apps use cookie-based sessions. If an attacker can find a link s/he can reproduce (forge) that involves executing something on a target page while a user is logged in, they can then embed such a link – with a malicious action – on a page where a user can click it, thus giving an attacker control of the account.

It is not uncommon for websites to be vulnerable to CSRF attacks. At various times, some major websites such as YouTube, The New York Times and INGDirect famously all had that issue.

In INGDirect case, hackers could gain control of users' accounts and transfer money out to an account that was open in user’s name but was not actually associated with them. In YouTube’s case, hackers could friend other users on behalf of a hacked user, add videos to the user’s favorites, and send messages on a user’s behalf.

A web developer generally needs to explicitly protect their app from CSRF attacks, and thankfully, Rails does it for us with default code. (Other languages often have plugins etc to help handle this issue, but Rails, as usual, makes things much easier.)


What Is Protect_From_Forgery?

According to to the Rails source:

Controller actions are protected from Cross-Site Request Forgery (CSRF) attacks by including a token in the rendered HTML for your application. This token is stored as a random string in the session, to which an attacker does not have access. When a request reaches your application, Rails verifies the received token with the token in the session. All requests are checked except GET requests as these should be idempotent. Keep in mind that all session-oriented requests should be CSRF protected, including JavaScript and HTML requests.

That means that your app will protected against CSRF attacks with one line in your Application Controller: protect_from_forgery with: :exception.


How Is Protection Executed?

General principle of CSRF protection is introducing user-specific secret data into the request that would not be accessible by a hacker. That is exactly how Rails does it. It protects your session via a :null_session method: an empty session is generated during a request.

It requires that a special CSRF token is present before any POST, PUT or DELETE request is accepted. That token will be included as a hidden field when using Rails forms builders. (Most browsers only support GET or PUT instead of all the proper RESTful verbs, but we know that Rails uses a hidden field _method to fix it.)

GET requests are not protected since they don’t have potential to leak sensitive data. That is why it is important to use GET requests appropriately in cases when a database is read or queried etc, but a user’s state in the app is not modified.

The required security token in question is known as authenticity_token. That token is known to its app, but not to others. To achieve that, its name and value must be added to every view that renders forms by adding csrf_meta_tags within html head tags. That is also a default option generated when using a Rails new command and places into a ApplicationDirectory/app/views/layouts/application.html.erb file, which is normally the only view file generated for a model-less app:

It’s interesting to see the source code for this in the Rails repo:

Is a CSRF token does not match, Rails will raise an InvalidAuthenticityToken.


What if I am running tests?

To disactivate this feature for the test environment:

protect_from_forgery unless Rails.env.test?


What If I am Building an API?

Since XML or JSON formats are also affected by this code, default forgery protection should be turned off if you are building an API as the API is designed to be stateless: protect_from_forgery unless: -> { request.format.json? }

There is more information on the Rails Security Guides.

Mastering Your Terminal -- Part III

Shutting Down Your Mac From Your Terminal:

sudo shutdown -r now

shutdown is the command you need.

Pass in the following options:

  • -h – halt the session, re-starts the system
  • -s – sleep
  • -r – re-boot the system
  • -k – kick everyone off but the super-user

And as for time options:

  • now – execute command immediately
  • +integer – execute command in x minutes (e.g., +10 is in 10 minutes)
  • yymmddhhmm – execute command on a given time and date

If you schedule a shutdown command, but decide to hold off of it, sudo shutdown -c will cancel it.

In my understanding, sudo shutdown -r now is a functional equivalent of sudo reboot

All those commands can be followed by a message that can be seen by other users who are logged in, for instance, sudo shutdown -r now 'Re-starting Now'.


Changing What Your Power Button Does:

In the OS X prior to the 10.9 Maverick, a power button used to bring up a Restart, Sleep, Cancel, and Shut Down options.

In later OS X versions, pressing it just puts your machine to sleep. If you want to have it bring up an earlier options menu, run this:

defaults write com.apple.loginwindow PowerButtonSleepsSystem -bool FALSE

Pressing the power button will then bring up this dialog:

If you want to switch back to the sleep-only option, run the same command with TRUE instead of FALSE.


Having Your System Restart Automatically If It Freezes:

While Macs tend to have relatively good uptimes (see here for more info what that is and how to find it out), OS X can still freeze up. Most users press the power button for a couple of seconds to have it turn off, and then press it again to turn it back on. That generally works well, but you can also type this in your Terminal to have its equivalent happen automatically:

sudo systemsetup -setrestartfreeze on

(It’s also useful if you are not there physically to press the restart button, for instance, if your Mac acts as a server.)

To disable this option, run the same command with OFF instead of ON.

Mastering Your Terminal -- Part II

Finding your way around: find, mdfind, and locate


find

  • find “walks a file hierarchy.” You can always search for files using Spotlight, but it is' easy on your Terminal as well.
  • find path/to/search -name name_to_search_for to search for a specific file name
  • find / -name name_to_search_for to search your entire computer
  • find ~ -name name_to_search_for to search your user directory
  • find path/to/search -iname name_to_search_for – add the -i flag to do a case-insensitive match.
  • find path/to/search -size name_to_search_for to search for a specific file size
  • find path/to/search -type name_to_search_for to search for a specific file type

As usual, there are many other search options that running man find will showcase, and they can be stacked together to filter results.


mdfind

  • mdfind query “finds files matching a given query” as per its manual. It uses metadata to search for queries, so it is basically a shell for your Spotlight search. Metadata, or data about data itself, is at the core of Spotlight – that is how pressing ⌘ space bar and entering ‘Ruby’ will show you a list of all documents that mention Ruby.
  • mdfind query note that the query does not have to be 1 word, but can be several.
  • mdfind image will find all image files (if you run it from any directory, it will still search for all images for an existing user, just like Spotlight does). If you run it, and it starts giving you an endless output of image file paths, just run Ctrl + C to stop it.
  • mdfind image -onlyin path/to/directory searches for all images in a certain directory

  • mdfind *query* -onlyin path/to/directory/1 -onlyin path/to/directory/2 paths can be stacked just like other queries.

  • mdfind query -onlyin $PWD to search in a current directory.

  • mdfind query -live watches outcome of a search for a certain query. So if a file with a matching metadata is added, the terminal tab/window in which you are running that command will show that file.

Boolean operators and mdfind:

You are probably familiar with boolean operators if you are developer. mdfind uses a very simplified version of them:

  • mdfind query1|query2 – OR; note no whitespace

  • mdfind query1(-query2) – excludes query 2; note no whitespace

  • Use () to group queries. To find matches to 2 queries, use mdfind (query1 query2)** as mdfind query1 query2 will only search for the second word.

  • Use "" to escape apostrophes, otherwise your Terminal will think your query is incomplete.


locate

  • locate “find filenames quickly.” Quickly is the keyword here. It relies on an index database of all filenames to find the one you need. Think of it as a cookbook index: instead of parsing throughout every recipe that uses shiitake mushrooms, you go straight to the index in the back. look for shiitake, and it tells you where to look for it. The problem with it is that the index is only updated once a week or so, so if you are looking for a newly created file, it may not come up.

  • Using locate for the first time ever or after a major system update can cause a following error: “WARNING: The locate database (/var/db/locate.database) does not exist.”

Follow the instructions to generate an index database; it will take some time to run as it will go through every file on your system to generate its index (in cookbook terms, someone had to go through and read every recipe and list every ingredient in the index.) It actually does not alert you to the fact it is being generated in the background, but it should work fine and if you run the command again an hour or so later, the database should be there.

You can receive instructions your index database is outdates, in which case you similarly need to follow instructions to rebuild it.

  • Note that both find and locate are case-sensitive when it comes to file names. Use -i flag to make them case-insensitive.